Friday, 6 July 2018

Cool Ideas To Nail The Best Product Photos

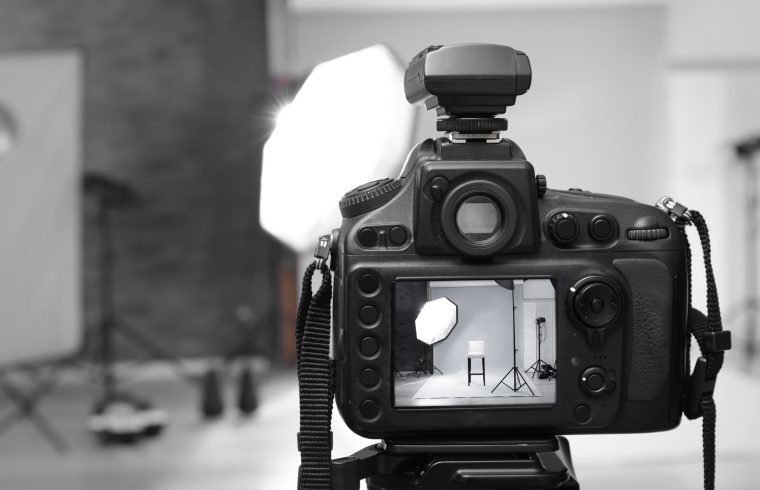
Creativity is an invaluable currency when doing product photography. It leads to the ultimate opportunity to showcase a product or brand to its target audience, and if done right, product photos can engage their audience and convert them into buyers and brand advocates. Here are some cool tips and tricks when doing product photography.

Place the product in its intended setting

Don’t just be content with a solid color backdrop and an empty set. Try to set up a scene that shows the product in its natural ecosystem and explore different environments and props to allow the audience to imagine more of what the product can do for them.

 Image source: cnet.com


Hang products if you must

Creative hanging works! Hang the product sideways, upside down, or in a unique location. Use wires or ropes that are still part of the final version of the photo. Elicit feelings of humor, weirdness, or sexiness. Let the lighting enhance the overall appeal.

Explore new, exciting angles

Product shots don’t always have to come out at eye level. An odd angle can also work and can be achieved by hanging the product normally but shooting from above or underneath. This can offer the audience an entirely fresh perspective and let them see the product in a different light.


Image source: digitaltrends.com

Stage the product well

How the product is set up greatly matters. Take care of it – iron clothes properly and wipe down and let anything with a reflective surface shine. Strive for perfection, especially if it’s a high-end product that exudes luxury and the good life.

Charles Nucci is a professional photographer from San Francisco specializing in high-end product photography. He has more than 15 years of experience. For similar reads, click here.


Sunday, 10 June 2018

Black And White Photography Tips For Beginners

Black and white photography is a hard craft to master. It requires a lot of technical know-how and resilience to get it right. Professionals have practiced it for extended periods before they could perfect it. So for someone new to the monochrome scene, where should you start? Here are some handy tips for beginners.

Image source: vandelaydesign.com

The first tip is to shoot raw and JPEG files simultaneously in monochrome mode. It is difficult to picture objects in black and white, and this can be an invaluable tool that helps you see how things look in black and white. This can also help you assess the scene and the composition of the shot.

Bright and dark colors offer great contrast, and these are further exemplified in monochrome. When taking shots, look for contrast as these will be the primary elements of your photo. What you want in your shots are strong blacks and whites. This can be done by choosing the brightness of an object or can be adjusted with your exposure settings.

Another good way of taking black and white shots is through long exposure. Long exposure can enhance the tonal contrast of an area. The blurring movement also adds texture to the photo while the solid object provides a beautiful contrast to its moving surrounding.

Image source: icons8.com

San Francisco-based photographer Charles Nucci is a professional photographer from San Francisco specializing in high-end product photography. He is also the head photographer of Nucci Studios Photography. For more reads on photography, visit this blog.

Monday, 21 May 2018

More great places to photograph in San Francisco

There’s more to gorgeous and scenic San Francisco than the Golden Gate bridge, the remnants of Alcatraz looming offshore, or the winding road of Lombard street. Below are other awesome places in Golden City that are surely worth taking photos of. 

Image source: thevictor2225.deviantart.com

de Young Museum observation deck 

One of the best museums in San Fran, de Young museum boasts of various art installations from all over the globe. But if your priority is to take panoramic, 360-view photos, then skip the lines and go up its free-admission Hamon Observation Tower. The museum is in the middle of the Golden Gate Park. 

Treasure Island 

Located in the middle of the San Francisco Bay and the historic venue of the 1939 World Fair, this place offers a wealth of photos of the city and the waterfront, especially after sunset when the buildings of the city skyline are all lit up. Take a ferry to Treasure Island and likewise enjoy snapshotting the Bay Bridge and the ferry building. 

Coit Tower 

One of the highest points in the city, Coit Tower has a 360-degree observation deck for taking sweeping vista shots of San Francisco. It’s named after Lillie Hitchcock Coit, a famous patroness of the city’s volunteer firefighters. The tower is located at the top of Telegraph Hill and has an admission fee of eight dollars. 

Marin Headlands 

Finally, there’s the Marin Headlands, which is technically not part of San Francisco but is the perfect place to shoot the Golden Gate Bridge in all its glory. To get there, you’ve to go up the hills of the Golden Gate Strait. Bring a coat or a jacket as it can get really cold and windy in the area. 

Image source: hopepostkids.com

San Francisco-based photographerCharles Nucci specializes in advertising and editorial photography. He is a member of both American Photographic Artists and the American Society of Media Photographers. More photography reads here.

Tuesday, 17 April 2018

Why You Should Hire a Professional Photographer

Anyone with a camera can take a photo of the moon.  However, if you’re looking for the best photos of the lunar surface, only NASA or other well-equipped observatories can give you what you’re looking for.  This could be the most convincing argument for hiring a professional photographer to cover an event.

Compared to amateurs, professional photographers have both experience and the equipment customized for specific photographic needs.  If you ask an amateur photographer friend to take photos of your wedding, then prepare to be disappointed.  Amateur photos, even when taken from a good camera, can come out out of focus, blurry, or way too dark.


If you’re having a hard time figuring out why some photographers charge so much, it’s because you are paying for the following items: equipment, manpower, and experience.  It may take just a second to snap a photo, but learning how to snap that photo at the right angle with the right camera settings takes years of practice to develop.

A lot of professional photographers have their own specializations.  While there are those who go out and cover weddings and parties, some are adept in the intimate moment between a mother and her child in an enclosed studio.


Just keep in mind that professional photographers are not magicians.  Some clients think that photographers can do insane tasks like making a group of people disappear or replacing a person by someone else entirely when they edit the photos in post.

A seasoned photographer, Charles Nucci specializes in advertising, product, and editorial photography. If you’re interested in reading more about photography, visit this website.

Thursday, 5 April 2018

Fashion Photography For The Beginner

Having subjects that are easy on the eyes and the latest camera gear don’t necessarily make an excellent fashion photographer. Learning from one’s own team, co-creatives, stylist, photographers, and make-up artists affords aspiring fashion photographers priceless for surviving the industry. Here are some tips:


Inspiration

Find inspiration in magazines, online, in the streets, or just about anywhere to fuel the mind’s creative juices. Since creativity is limitless, one can start building from ideas and sources from others. One’s inspiration becomes the foundation of every shoot, and developing a concept that is strongly and genuinely one’s own is the key to the following step in creating the perfect frame in a photo shoot.

Team work

It takes a village to create magnificent shots. Build a team that is composed of people with whom one is comfortable working and who are constant learners of the field. Carry the same vision and concept; be clear on these before every shoot so as to be on the same page always. At the end of the day, it’s not the photographer’s hands that make the shot, but the efforts of every member of the team.

Model

While a success of a shoot doesn’t rely on the model’s prowess, finding the right person to model the product or the look is crucial. The model must have the right look for the concept. Photographers and models who have good chemistry make the shooting environment comfortable for the whole shoot crew. Usually, there’s music in the set to get the model into character. When a shoot is in progress, there’s only the photographer, the model, and the camera.


Charles Nucci is a seasoned product photographer based in San Francisco, with more than 15 years of experience. The founder and the head of Nucci Studios Photography, he specializes in advertising, product, and editorial photography. He is a member of the American Photography Artists and the American Society of Media Photographers. Learn more about his industry here.

Wednesday, 7 March 2018

Tips and Tricks When Photographing Children

The perfect shot can be the most difficult thing in the world to achieve if it involves a child, someone who won’t sit still, smile, or spare the camera a couple of minutes of quiet or inactivity. Kids can also assume weird positions or do things that are out of the ordinary. So, what to do? Here are some tips and tricks to get great, (almost) perfect shots involving kids.

Image Source: Pixabay.com

Follow the subject’s lead

Since instructions rarely work for them, let kids roam, explore, and play with the props or objects on the set. You’ll get natural smiles as well as expressions that will surprise and even make you laugh – capture those spontaneous moments.


Don’t put the camera down

The golden opportunity can come at any time, so keep shooting, observing, and letting the creativity flow. Photographing long enough can result in wonderful shots.


Don’t force it, but be sneaky

If a child isn’t enjoying anymore, put the camera away. But there could be a chance of them not seeing you or knowing you’re taking photos, so pick special moments when they’re completely engaged in something else. Snap away when that time comes!


Get down on their level

Shooting from an adult perspective can make a child look even smaller, so get on equal ground and get down to their level. Crawl around on the floor and play with their toys.


Be funny

Be a goofball and just have fun, as the best images could come out of letting one’s hair down and being in a cute adventure with the models – the tiny tots.


Image Source: Pixabay.com

Charles Nucci is a seasoned photographer based in San Francisco, CA, and the founder and head photographer of Nucci Studios Photography. For similar reads, click here.


Friday, 22 December 2017

Creating Filters From Everyday Objects

Computer programs and apps have been developed to make life easier for photographers. From Photoshop to Instagram, editing a photograph post-production has never been easier. However, veteran photographers who’ve been around before the emergence of these apps have had the opportunity to create their own filters with everyday objects. For those who want to try it out, here are some examples.
           Image source: Rgbstock.com

Negatives of colored film can simply be held up in front of the camera lens, and it becomes an instant filter. The only challenge though is finding negatives of colored film nowadays.

Cellophane is a favorite of film directors and cinematographers. To create a different aura indoors, photographers would cover entire windows in cellophane. Outdoors though, they can just wrap the lens with cellophane. They can also be mixed for a more surreal image.

Wine glasses may not be the first thing that comes to mind when people mention DIY filters, but it makes for a magical shot. The trick though is experimenting with it. Move it for a more blurred image if so desired.

                        Image source: Slrphotographyguide.com


Drapes are obviously for indoor shots. Light-colored drapes that allow light to enter and those with designs will change indoor images dramatically.

Charles Nucci is a professional photographer. He is the founder and head photographer of Nucci Studios Photography. Learn more about his studio’s products and services by visiting this website.